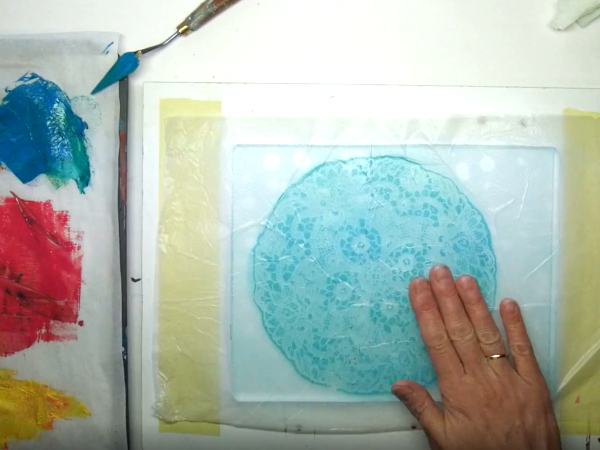
Nachdem ich eine Vorauswahl an Collagepapieren für die erste Zeit meines 100-Tage-Projektes getroffen habe, kam mir die Idee, noch ein paar farbige Papiere mit der Gelatineplatte zu drucken.
Ich nutze eine gekaufte Platte im Format 20 x 25 cm. Als Papier verwende ich einerseits ein Linoldruck-Papier (120 g/m²), andererseits gesammeltes Seidenpapier.
Meine bunte Palette besteht aus Zitrongelb, Orange, Magenta, Coelinblau, Blauviolett und Phtalogrün. Dieses Mal kein Weiß oder Schwarz.
Ich habe die Möglichkeiten des Gelatinedrucks bei weitem nicht ausgeschöpft. Aber hier ging es auch nur um ein paar Collagepapiere, die ein wenig Struktur aufweisen sollten. Das Drucken geht schnell und macht Spaß.
Eine Druckplatte kann man sich mithilfe von Speisegelatine und Wasser auch ganz einfach selber herstellen. Ich habe das früher schon gemacht. Nachteil: Es dauert einige Stunden, bis die Platte fest und nutzbar ist, man kann also nicht spontan losdrucken. Das einfache Rezept ergibt auch keine dauerhafte Platte, nach einiger Zeit im Kühlschrank trocknet sie ein oder beginnt zu schimmeln. Aber um die Technik einfach mal auszuprobieren, ist das eine preiswerte Möglichkeit. Eine gute Anleitung findet ihr auf Gerda Lipskis YouTube-Kanal.
Collage Paper: Printing with a Gelli Plate
After making a pre-selection of collage papers for the first part of my 100-day project, I had the idea of printing a few more colored papers with the gelli plate.
I use a purchased plate in the format 20 x 25 cm. As paper I use linoprint paper (120 g/m²) on the one hand and collected tissue paper on the other.
My colorful palette consists of lemon yellow, orange, magenta, cerulean blue, blue violet and phthalo green. No white or black this time.
I have by far not exhausted the possibilities of gelli printing. But here it was only about a few collage papers that should have a little structure. Printing is fast and fun.
You can also easily make a printing plate yourself using gelatine and water. I’ve done this before. Disadvantage: It takes a few hours until the plate is solid and usable, so you can’t start printing spontaneously. The simple recipe does not result in a durable plate either, after a while in the fridge it dries up or starts to mold. But to simply try out the technology, this is an inexpensive option. You can find good instructions on Gerda Lipski’s YouTube channel.